TAKIKAWA Japan
Calibration gauge
Gauge pin Unit TMG Series
and Fixture 01,02,05…
for TM/TMS Series
Gauge Fixture / Calibration gauge unit for Surface Variation Detector
Outside diameter concave-convex detector – TM calibration
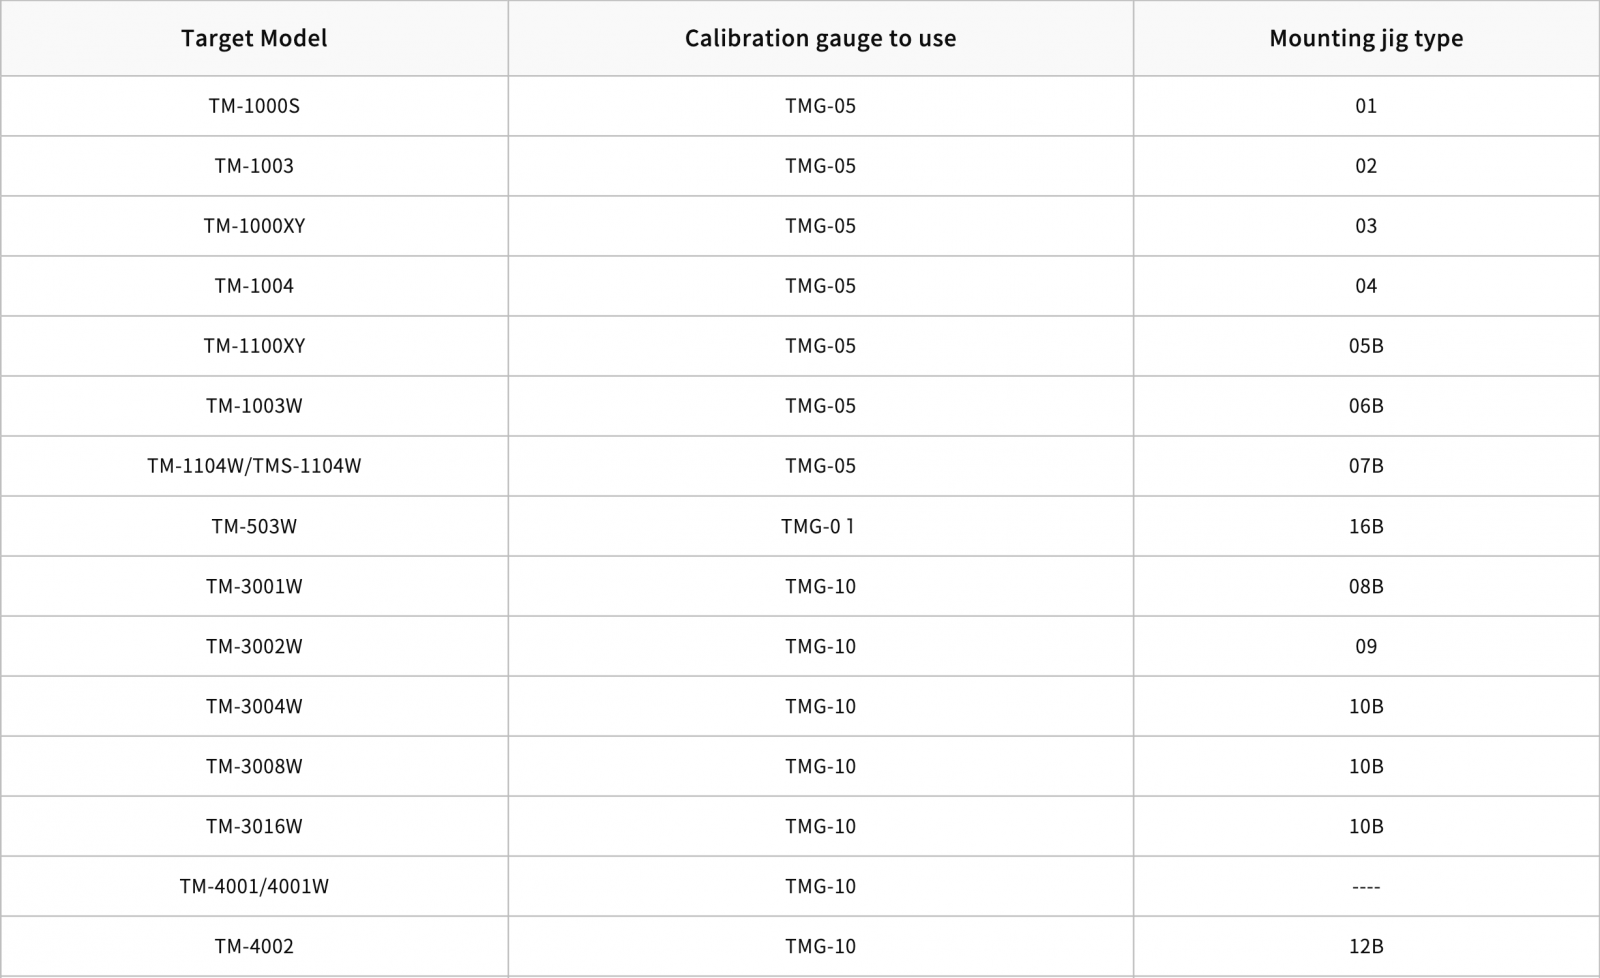
Gauge Fixture and corresponding gauge unit table


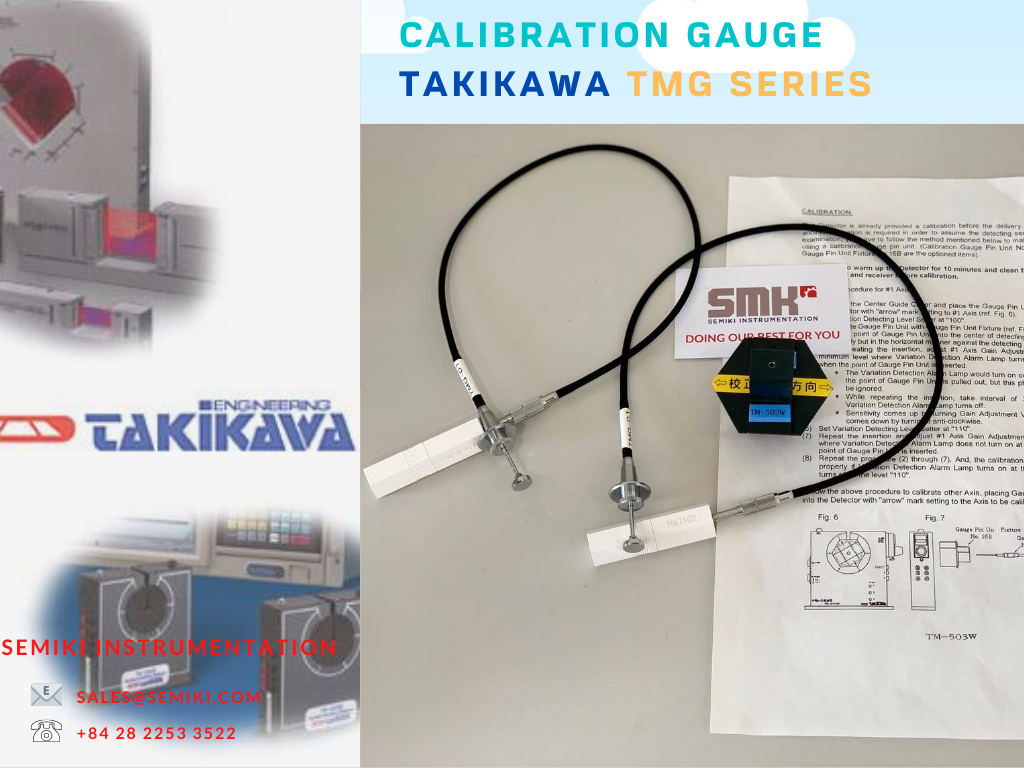
Picture: Pin gauge TMG-05 with fixture 06B calibration system for TM-1003W at Semiki’s warehouse
SEMIKI will explain with 1 axis as an example.
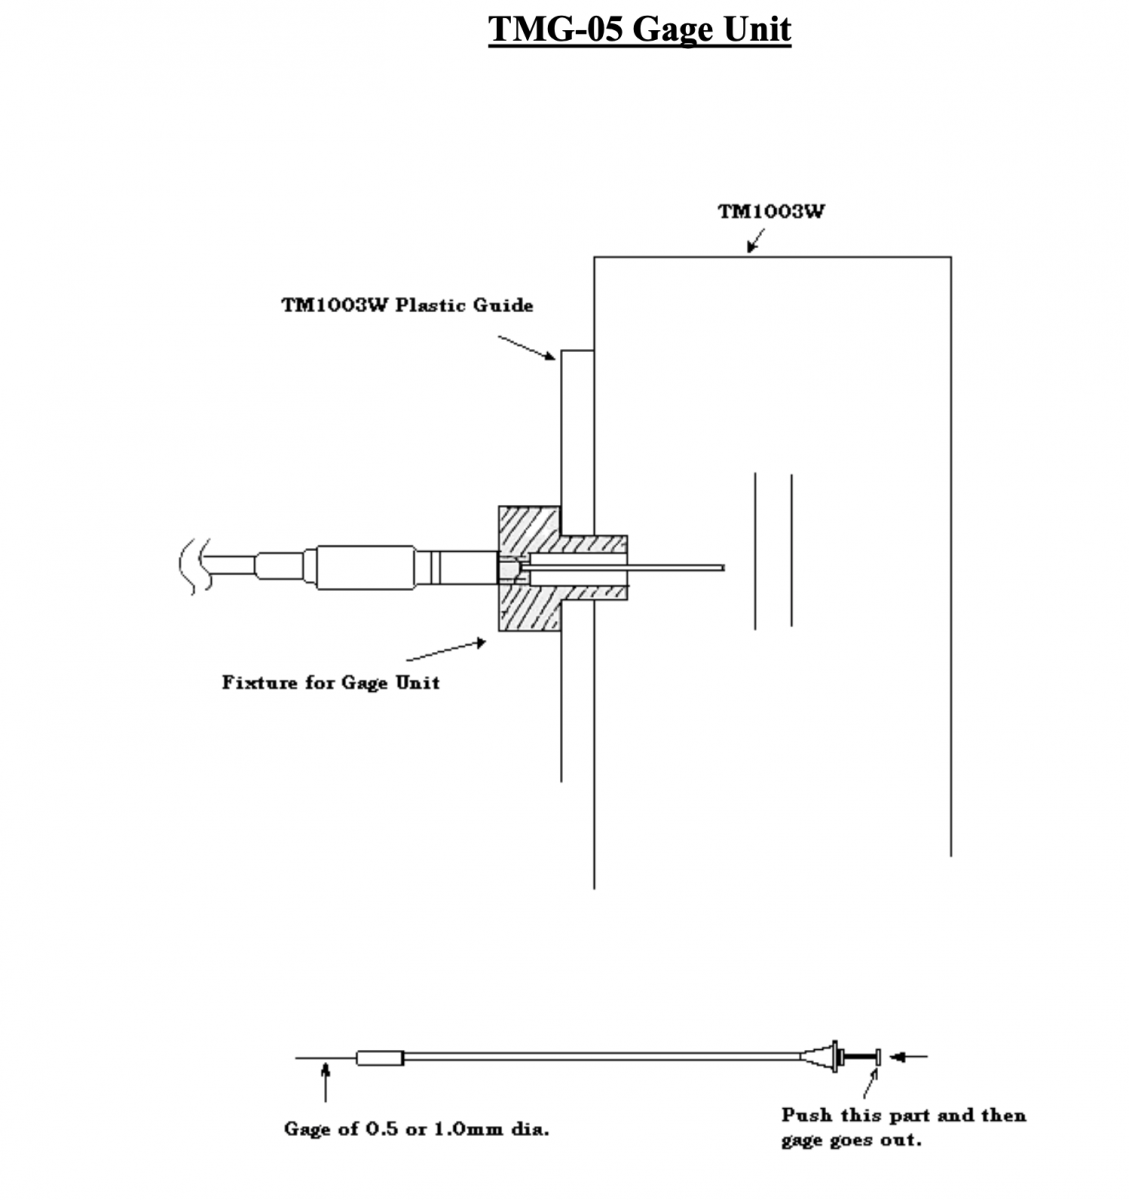
1.Set the Gauge Fixture according to the axis for calibration (this time, 1 axis). (The figure below)
2.Set the level setting dial to “1.00”.
3.Insert the gauge tip quickly into the center of the measuring range. At this time, please insert gauge so as not to be inclined as much as possible.
4.When the gauge tip is inserted while repeating the insertion several times, adjust the gain setting VR of 1 axis the lowest to light up the detection alarm lamp.(herein after lamp)
* It is not abnormal although the lamp may light up when extracting the tip of the gauge.
* Set an interval of about 3 seconds after the lamp is turned off when repeating the insertion of the gauge tip.
* VR for gain setting increases sensitivity when turned clockwise, and decreases when turning it counterclockwise.
Change the level setting dial to “1.03”.
Repeat the insertion of the gauge tip in the same way.Now adjust the VR for 1 axis gain adjustment so that the lamp does not light up when inserting the tip of the gauge.
The calibration will be completed after repeating steps (2) – (6) several times to light up at “1.00” and not light up at “1.03”.
Example of calibration method TM-3004W use Pin gauge TMG – 10, Gauge Fixture 10B

Example of calibration method TM-1003W use Pin gauge TMG -05, Gauge Fixture 06B

Maintenance and calibration :
► We also have calibration certificate attached ( optional )
► Please re-calibrate after use for a certain period through our purchase store. Local Vietnam : SEMIKI CORP

DISTRIBUTED BY:
Semiki instrumentation Co., Ltd
Email: sales@semiki.com
Office tel: +84 28 2253 3522
~DOING OUR BEST FOR YOU~